| Home Page
My Ride
Option Packages
Links
Contact Page
My B15 Photo's
Modification How Too's
Modification How Too's part 2
Eibach Sportline install (front)
Eibach Sportline install (Rears)
|
|
Modifications page part 2....
Here's another page of modification instructions that I have performed on my car...Once again I will try to put them up step by step to try to help out with anyone doing these mods to thier cars...But like I had mentioned before if you have any questions about the installs or you don't understand anything that I posted please feel free to e-mail me or send me an AOL instant message at EWAL386583 and ask me anything I'll be more than glad to try to help you out the best that I can...
|
| |
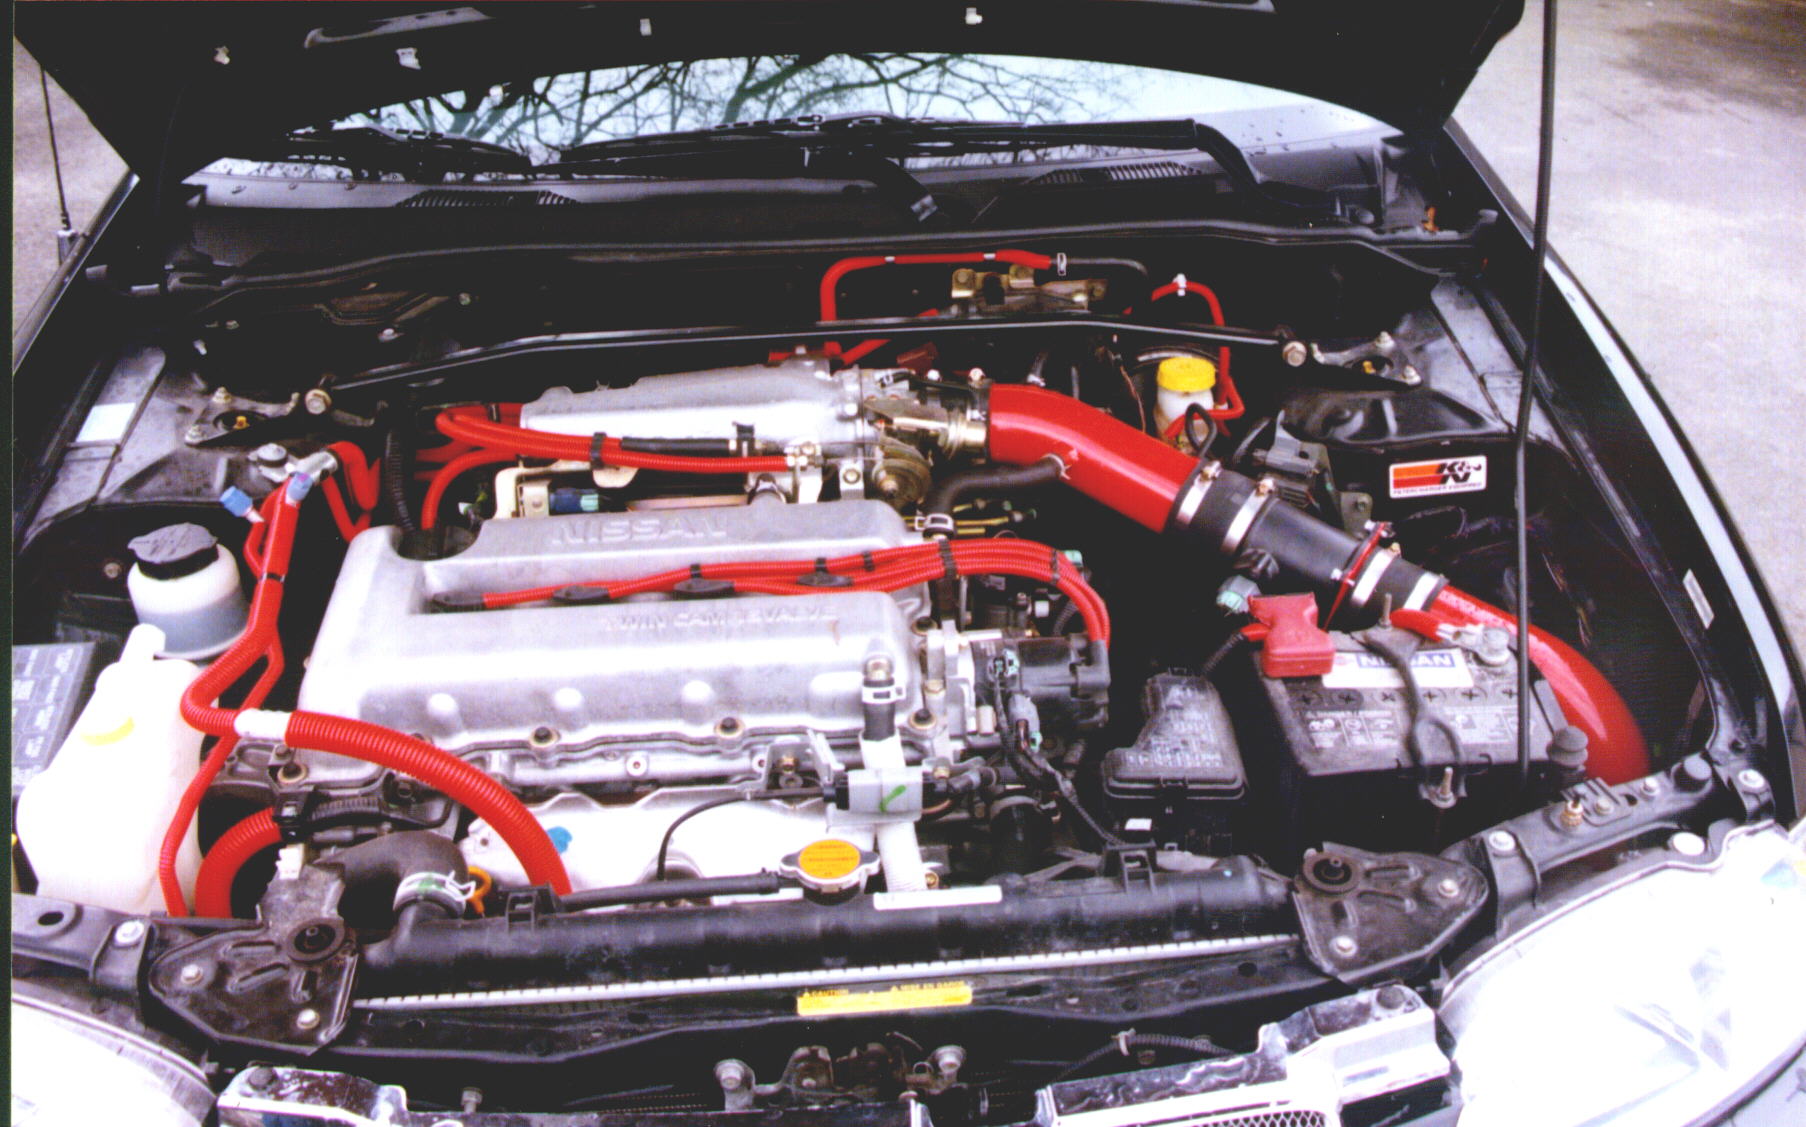
Place Racing CAI install instructions.
1.Dissconnect the negative terminal from your battery.
2.Start of by removing the stock air box which you can get some excellent instructions from the www.b15sentra.net site under the free-air box mod.
3.Once that is off you can take the first section of the tube and slide it on to your throttle body and connect all of you hoses to it...
4.Then connect the MAF adapter plate to the end of the first section of the pipe.
5.Connect the stock MAF to the adapter plate...
6.Connect all the sensor plugs..
7.Use the dremel to open up the whole large enuff for the pipe to fit properly and use some sort of a gasket to put around the rough edges of the section you just cut to prevent scratching to the CAI pipe.(I used a piece of black rubber hose that I cut one side down the middle and placed around the whole).
8.Put the filter on the end of the pipe..(i found this to be alot easier).
9.I slide the last pipe up thru the hole with the filter on to make it go on alot easier cause there isn't alot of room to manouver around in there where the filter is.
10.Pull the tube up from the hole and slide it on to the stock MAF.
11.Attach the last sensor in the hole on the side of the intake pipe.
12.then tighten everything up.
13.Reconnect the negative terminal on the battery.
|
 Place Racing Cold Air Intake tools needed:
Pictures of it installed will be up soon.
Screwdrivers(various sizes)
Sockets(various sizes)
Dremel
WD-40 or vaseline
NOTES:
Make sure you dissconnect the negative terminal on the battery.
Leave all the connection brackets loose until you have it positioned properly.
one of the hoses that is connected to the top pipe section may not fit properly so you can wrap it with a little bit of electrical tape and go to your local automotive store and pick up a small clamp and use the smaller clamp instead of stock,works alot better this way.
Make sure you tighten everything up nice and snug.
*******I can't stress this enough Please make sure before you connect the negative terminal back on the battery you make sure you check all the Sensors to make sure have them connected properly,to prevent yourself from getting an check engine or serveice engine light...*********
Get in you car and enjoy this bad boy.....
|
| |
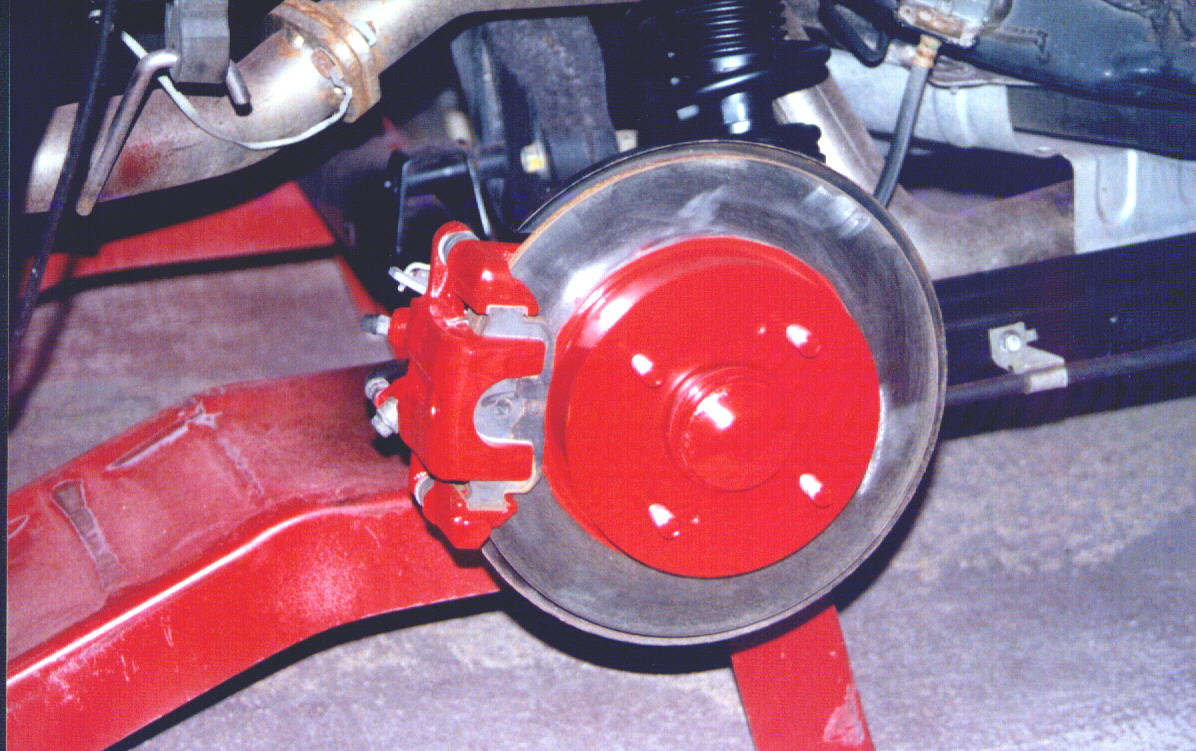
Brake Caliper painting instructions..
Take caliper of of rotor and use a rope or a metal clothes hanger to hold it up you don't wanna let it hang there.
Take the wire brush and scrap the calipers clean of any rust or corrosion..
Follow the same procedure for the rotor as well.
Take the masking tape and tape up anything you don't wanna get spray all over and throw some cloth over things if needed as well.
Spray calipers giving small light coats instead of trying to do a large coat first,you'll get better results this way.
let dry for at least an hour but if you can let it dy for longer,,let it....
Unmask everything pop the caliper back on the rotor and there ya go nice custom looking calipers and rotors..
Make sure you use a high heat paint,,I used VHT paints they are a really good aerosole spray paint company.
|
 Painting Brake Calipers tools needed:
Pictures will be up soon.
Paint(Either spray or brush on type)
Masking tape
Some cloths
Wire wheel attachement for drill
Steel wire brush
Sockets(various sizes)
Something to hang the calipers up with,wire or rope or what ever you have.
NOTES:
The more you clean the calipers and rotors the better the results will come out..
Be carefull when cleaning the rotors off so you don't scratch up the rotors..
Use a high heat paint...
|
| |
Sidemarker Installation
You first decide where you want them to be placed and then you use a ruler to measure from different points on the car and mark all the points using something like a carpenters pencil or something to mar with and mark the center points...Then you find out the size of the whole you have to drill to accomodate the cylnder of the sidemarker itself...
Then once you've decided the spot you're going to mount it you then take a smaller drill bit at first to make a pilot hole for the large bit....then once you have the small hole drilled you then change the bits to the larger bit that is required for the cylnder to fit correctly.And proceed to drill out the larger hole... and test fit the sidemarker to make sure the hole is the proper size to accomodate the marker...once the side marker fits you mark the holes where the screws get mounted and proceed to drill them out...But before you drill those holes make sure you have the sidemarker nice and level and where you want it.. Next step is to run the wires through the fender and into the engine compartment,I used two pieces of coat hangers to snake the wire through and make sure you leave yourself enough wire to play with...and then put the sidemarker into place and fasten the screws down nice and snug...And then you have figure out which wires you'll be tapping into(only the positive is actualy tapped) I grounded the negative to a screw or nut attached to something metal next to the lights....and I then used a blue quick splice connector to attach the positive wire to the positive wire on the blinker and your install is complete.....
Tip you might want to check the sidemarkers out before you install them,,incase one is not working... You can do so by touching the wires to the battery's positive and negative terminals....
|
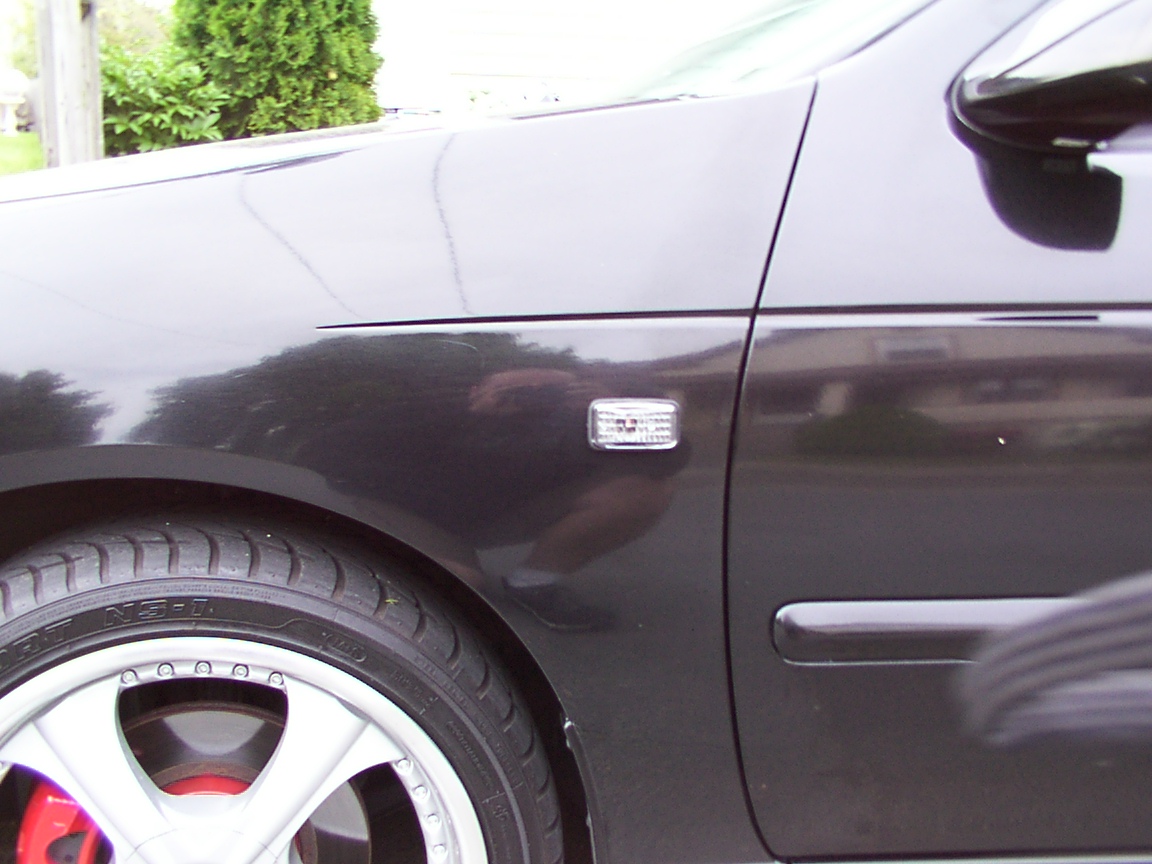 Sidemarker installed
Tools needed:
Drill
Drill bits various sizes
Tape measure
Coat hangers
Marker or Carpenters Pencil
Quick Splice connectors
And some sort of meter to check for voltage
Screw drivers-both flat and phillip heads
|
|

